Browse Images Maps Play YouTube News Gmail Drive More Assist Report a problem about Google Groups Keyboard shortcuts Check in.
Chalking is a grainy residue on the roof surface resulting from destruction of that product from exposure. It is NOT from settled dirt. Chalk must be removed by cleansing in order for the applied coverings to have proper adhesion. The very best way to clean your roofing is to power-wash the surface.
 The Ultimate Guide To Rv Roof Coating
We suggest you scrub the roof with water and TSP (Trisodium Phosphate) solution to eliminate all dirt, oils, grease and chalk. SUGGESTION: Before finishing starts, roof surface ought to be contacted tape to see if it is really clean. If the tape manages tight and evenly, the surface area is tidy.
KEEP IN MIND: If no quantity of cleansing produces an appropriate tape pull, a primer should be considered. The three M's Mildew, Moss and Mold, are usually fuzzy, greenish or bluish-grayish-white and THEY'RE ALIVE. Cement and tile roofs are especially prone to mildew due to the fact that they include minerals which are needed to support development.
Sites: best roofing companies in Tucson - DC Roofing of Arizona https://postheaven.net/tophesluqf/browse-images-maps-play-youtube-news-gmail-drive-more-help-report-a-problem
To safeguard your roofing system, supply appropriate drainage and expose shaded locations to sunlight where possible. Prone areas that can not be fixed ought to be cleaned up with a chlorine bleach option two times each year. Tidy the roofing system surface by power-washing or scrubbing with TSP (Trisodium Phosphate). Treat mildewed areas with a chlorine bleach service.
Follow the Kool Seal easy 3-Step Process for the Moss: very small plants that grow in velvety, green clusters on moist surfaces. Mold: a downy or furry development on the roofing surface area brought on by fungis, especially in the existence of dampness or decay. Mildew: a fungi that can appear on a surface when exposed to dampness, it appears as a thin, furry, whitish discoloration.
Foam Roofing Advantages: The Benefits Of Elastomeric Roof Coating
It is very important to seal your roofing as soon as you see indications of alligatoring. If the surface area is left unguarded, it can weaken beyond a point where a roof finish will work. Remove loose previous coating. Tidy the roof with water and TSP (Trisodium Phosphate). Wash completely and let dry.
Use to reinforce patching cement on all fractures. If your roofing system appears like this, see a roofing professional and have it replaced. This is what takes place to asphalt if it's left exposed and unprotected. The finest way to avoid this from happening to your roofing is to spot and reinforce all cracks with or.
Like Blister on your skin, blisters on a built-up roof (or BUR) occur when water gets trapped under the leading layers of the surface. With a little work you can eliminate this problem from your roof. If in doubt, speak with a licensed Roof Professional. Scrape off loose previous finishing.
Rinse completely and let dry. On blistered locations, cut an X through the entire blister and allow wetness to vaporize and dry thoroughly prior to patching. Spot withor, the usage to reinforce patching cement over the blister and on all fractures. Top coat with a for the very best performance. Visualized left is a condition referred to as loose lap.
With a little bit of work you can remove this problem from your roofing system. If in doubt, seek advice from a licensed Roofing Expert. Prepare the surface area per bundle instructions. Safe and secure loose laps in location with, and after that utilize to reinforce patching cement on all cracks. Leading coat with a or for the finest efficiency.
This condition is called "fishmouthing". If left unattended, fishmouths might permit water penetration into the roof. With a little work you can remove this problem from your roofing. If in doubt, consult a qualified Roofing Expert. If loose edges extend back just a couple of inches, the loose material might be snipped off and disposed of.
The Benefits Of Elastomeric Roof Coating
Trim flaps so they lie flat. Seal with and reinforce with. Then top coat the whole roofing system surface area with a or for the finest performance.
Examine your Lexis roofing finishing system frequently. Keeping the roofing system clean and devoid of debris will give you optimal efficiency and longer life span. Touch up any harmed locations right away to avoid substrate deterioration.
Hi everyone, I'm hoping someone can provide me some insightabout a month ago my darling other half, in an attempt to assist me, painted the roofing system of my horse trailer with the silver seal aluminum coating. When he understood the covering was diminishing the sides, he got the intense concept to simply paint my entire (steel) trailer with it.
It's now a mahogany color. He also utilized a paint brush, so it's extremely streaky. Exists a method to remove this stuff? I've provided him a month to repair it, however it's show season and I require my trailer back! Can I just paint over it? The thing just cost me 3 grand, it doesn't need to be beautiful, would simply prefer for it to look a little better than if does presently! Any tips would be terrific! Thanks ahead of time!!! Sorry to be the bearer of problem but I do not understand of a method to eliminate it.
I 'd say the finest bet would be to put numerous coats of white paint over it. Yes the un combined aluminum coat might bleed through, so you paint it once again. There are some products that will remove the asphalt, but they are really destructive and would make an absolute mess.
 White Roof Coating Costs And Benefits
https://www.youtube.com/embed/oXIQ7SbBVtU
Waterproofing the RV roofing is among the most important things to do. It can make a big difference in between cost savings and losing money on significant repairs. It is why Recreational Vehicle owners must use a sealant to the roofing regularly as a part of upkeep. However, there are times when you need to take the old sealant off, and replace it with a brand-new one.
 Log in with Facebook

 - Cora Seton")

 Acrylic Roof Mastic
 Tips For A Better Roof
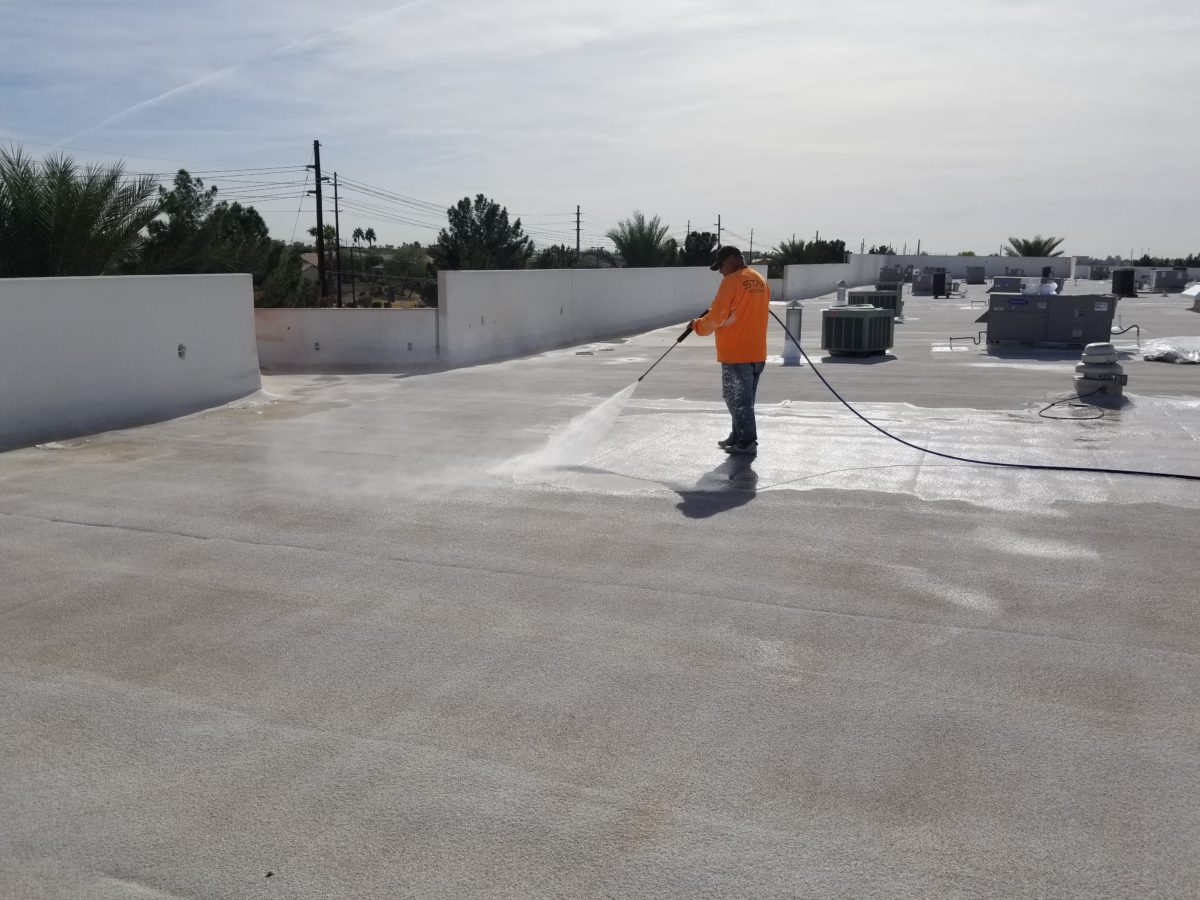 Proper Surface Preparation Is Essential Before Applying Roof
 What Are Elastomeric Coatings And Where Can You Use Them?
 How Long Does Elastomeric Roof Coating Last?
 How To Apply A Roof Sealant
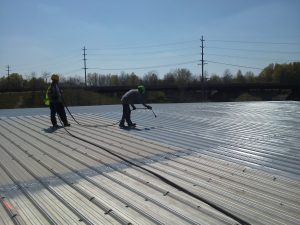 A Coatings Specialist Explains How To Correctly Apply Roof Coating
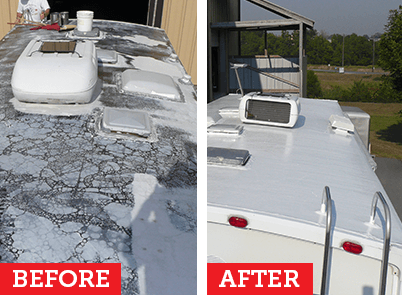 Kool Seal 10 Year Elastomeric Roof Coating
 Acrylic Roof Mastic


