logo
Wrong email address or username
Incorrect verification code
back to top
Search tags: 3d-printing
Load new posts () and activity
Like Reblog Comment
text 2023-02-04 10:27
Why My HP Printer Not Printing Black Ink?

Many of the HP printer user experiencing black or color ink printing issues from little to no ink on the printed paper. In such case we have to explore the reason for the issue to eliminate the hp printer not printing black issue now and in the future too. Follow the below description for a detailed insight on the reason along with the easy to follow instructions.


Common reasons for not printing black ink

  • Ink cartridge issues
  • Print head malfunctions
  • Corrupted Hp printer driver
  • Insufficient ink levels
  • Irrelevant paper settings

Troubleshooting HP printer not printing black

Always use genuine HP ink cartridges

Make sure that you are having enough ink in the cartridges

  • From the printer control panel tap on the minus icon next to the setup icon
  • Then use the navigation button to choose tools and click Ok
  • In the following tap on the Estimated ink levels and click ok

Based on the result you have to replace or repair your ink catridges.

Identify the damaged ink cartridges

To identify the damaged ink cartridge you have to print the print head test page. Then analyze the quality of the print. From that you can identify the damaged ink cartridges.

Replace the empty or the damaged ink cartridges

If you find that your cartridges are damaged follow the below steps to remove them

  • Initially load your printer with enough paper
  • Then open the cartridge door
  • Wait for your printer to become silent
  • Remove the cartridges without touching the copper contacts and ink nozzles to prevent any damages
  • Next take the print heads out of the plastic tape
  • Without touching the copper contacts snap them in the respective ink slots

Try cleaning the print head

Cleaning the print head can help you resolve the clogged print head issue. For that follow the below steps:

  • Initially load sufficient paper in your printer paper tray
  • Then from the lower-left corner  of the printer control panel, tap on the minus button next to the setup icon
  • Use the navigation button to choose Tools and click Ok
  • Then from the following select Clean Print head option and click Ok
  • Check the Printheads test page
  • Follow second-level cleaning guidelines if the quality is unacceptable

If none of the above steps help solve the not printing in black issue, it’s time for your HP printer to given for service.

Read more:

Like Reblog Comment
text 2022-12-28 15:09
How to Resolve HP Printer Printing Very Slowly?

You are printing with your HP Printer and suddenly felt some sudden slow in the pace, tired every known methods and tired of everything? Then you are at the right place here with us. We will list the possible reason for the hp printer printing slow and the available solutions that could keep you away from the slow printing in the future.


Possible reasons that cause your HP printer to slow down are:

  • The damaged or defective ink cartridge or the toner
  • The stacked print queue
  • The printer is connected to a shared network connection
  • Interrupted network availability
  • Damaged power and USB cables
  • Irrelevant print settings
  • Paper and ink out of stock
  • Outdated printer driver


Troubleshooting hp printer printing slow issue:


Solutions for Mac users:


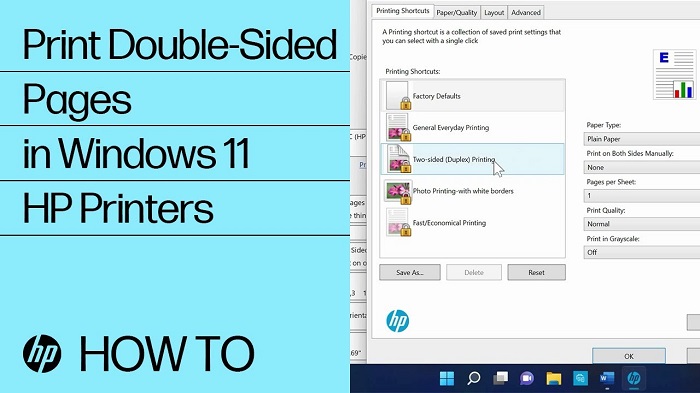
Solution 1: Check the quality of the print settings

The shortened fact is the high quality print takes a lot of time to print, as it will take more ink and time as well as. Hence use the high-quality settings only on the needed task. Other time you can use economy mode which takes less ink and saves you more time. To adjust the ink settings, follow the below steps

  • Initially click the spotlight shaped icon and enter preview
  • Now tap on the file and open option to get the document/photo open
  • Next click on the file and click the print option
  • This will open up the print job settings
  • Next select your printer and tap on the Show details option
  • Then open the Print Quality menu
  • Next tap on the Media & Quality option
  • Then from the drop-down choose Media & Quality or the Paper Type or Quality option
  • Now choose Normal or Draft option from the quality or print quality menu
  • Make the required changes and apply the changes


Solution 2: Reset your printer

Sometimes a simple reset can help you get over those technical glitches if you have any.

  • Initially you have to plug out the power cord while your printer is still turned on
  • In case of rechargeable battery printer, remove those printer
  • Then wait for few minutes before plugging the power cord back into the printer and the wall outlet
  • Finally turn on your printer.
  • This will reset your printer to its default print settings


Solution 3: Try turning off the quiet mode

Unfortunately, by reducing the printer sound you are reducing its speed too. So check that also while you need some speed.

  • Initially you have to open the printer homepage
  • Click on the spotlight icon
  • And search forPrinters & Scanners
  • Now choose your printer name and select Options & Supplies
  • From the following screen select Show Printer Web Page
  • In case of HP Smart app, you can select our printer
  • And then choose EWS or the printer home page
  • In the EWS page, you may asked to enter the admin password or the PIN that has been sent to your printer
  • Then from the Setting tab, you can select the Preferences option
  • Then choose Quiet mode and choose off, finally click Apply to set the changes


Solutions for Windows users:


Solution 1: Try resetting your printer

  • Initially you have to plug out the power cord while your printer is still turned on
  • In case of rechargeable battery printer, remove those printer
  • Then wait for few minutes before plugging the power cord back into the printer and the wall outlet
  • Finally turn on your printer.
  • This will reset your printer to its default print settings


Solution 2: Use HP Smart app instead of HP Print Driver

  • Initially disconnect any cables connected with your printer
  • Then from your windows search for Add or remove programs option
  • Now in the following search and choose your printer name
  • On finding your printer name, click on the printer and choose Uninstall
  • In case if you don’t find your printer name, search and find Printers & scanners
  • Then in the following screen select your printer and choose Remove device option
  • You have to click yes in the User control message
  • Then simply follow the displayed guidelines to successfully remove the printer software
  • Now navigate to the HP official site and download the HP Smart app for your device
  • Giving the print job through HP Smart app can noticeably improve the printing speed


Solution 3: Try to check and reinstall those ink cartridges

If you don’t have installed the ink cartridges as per the guidelines or if it is not fitted properly in the slot then it can also cause printing issue.

  • Initially press the power button to turn on your printer
  • Then open the cartridge door of your printer
  • Next, wait for the carriage to move and come to a rest state
  • Now press cartridge head for it to release from the slot
  • While taking them out, don’t touch the copper contacts
  • This can cause a permanent damage to them affecting the printing process
  • Besides they can also cause clogs, electrical connection failure, and ink flow issue
  • Check the cartridges, on seeing any pink tape is still intact, remove them
  • After checking the inside, reinsert the ink cartridges and close the cartridge access door

Along with these above steps follow the steps to turn off the quiet mode in your windows system.


Read more:

Like Reblog Comment
text 2022-08-30 13:59
How to Print Both Sides of the Paper with HP Printers?

Looking at ways how to print both sides of the paper with an HP Printer, then this article is for you. Read below to know the steps for printing on both sides of the printer on windows and mac.


Before starting with printing on both sides let’s find out that your printer has these capabilities. For that follow the below steps.

  • From your system, open the document that you want to print
  • Tap on the file tab
  • Choose Print option
  • Then in the settings, check the options
  • If it has a print on both sides option then your printer has a duplex printing feature available


How to print both sides of the paper with an HP Printer


First, you have to prepare your duplex printing setup. For that, load enough paper in your printer based on the previously initialized setup. Make sure that you are having enough ink in your printer cartridges.


Steps to print both sides of the paper with an HP Printer on windows


  • Open the document that needs to be printed
  • Then tap on the Print option on the File menu
  • Now choose printer properties and select Preferences
  • In the following Properties window choose the page layout
  • Choose booklet or tablet layout
  • For HP printer with Layout menu
    • Click on the Finishing tab, and choose to bind. Then in the flip option, you can select Print on Both Sides Manually or Print on Both Sides option.
  • For HP printer with printing shortcut menu
  • Now click ok
  • Then click Print
  • If it doesn’t print automatically remove and load the paper
  • Tap on the continue to start printing on the other side
  • Once completed remove the check mark on Print on Both Sides for the normal printing process


Steps to print both sides of the paper with an HP Printer on mac devices


For printing, both sides on the Mac OS, follow the same general procedure up to paper loading in windows. Then

  • Tap on the File Print and choose the Show Details option
    • If the two-sided settings are available
      • You can choose Layout. For the Booklet model, select Long-Edge binding and for Short-Edge binding perfect for Tablet layout, select the two-Sided option. Finally, Click Print.


  • For the printing options menu without a name
    • You can choose Paper Handing. Then from the Pages to Print menu, select the Odd Only option.
  • Now select the page order menu from the Reverse and Automatic option
  • Finally, click Print


Printing on both sides of paper called duplex printing can make most of your time-consumable job easy. We hope this article has assisted you with the duplex printing with HP printer on windows and mac. For more information and related queries with HP printing, please contact HP customer support executives for a personalized solution.


Frequently Asked Questions


Like Reblog Comment
text 2022-08-17 14:07
How Can I Setup My Brother Printer for Wireless Printing?

Looking for instructions for Brother printer wireless setup with your wifi network? Then read along for end-to-end assistance with this article.


General instruction for Brother wireless setup


Before starting with the Brother Printer wireless setup, you have to collect and made some prior arrangements for a seamless wireless connection setup. First, make a note of the network name (SSID). Then the network key (password). Find them on the side description of the access point or the router. If you can’t find it there, check the documentation that came along with the router.


  • Initially take your power cord and connect it with the wall socket and Brother Printer
  • Now turn on your printer
  • Then press the menu button from the printer control panel
  • Use the navigation button to choose the Network option and click ok
  • In the following page use the navigation button to choose the WLAN option and click ok
  • Again use the navigation button to choose the Setup Wizard  option and click ok
  • In the upcoming WLAN Enable? The message, choose Yes


This will enable the wireless network and start the wireless setup wizard. Now you can see that your Brother printer begins to search for networks and lists the available network. Choose your network and press ok. If the process is complete you can get a connected message. If not the machine will print a wireless connection report. Check the error code and troubleshoot the issue.


Quick steps for Brother device wireless setup with WPS method


For WPS (Wi-Fi Protected Setup), you have to make sure that your Wi-Fi access point/router contains a WPS symbol indicating that it supports the WPS method. Then know the Wi-Fi access point/router Wi-Fi signal range and place your printer within the range.


  • Initially press the WPS button on the Wi-Fi access point/router
  • Then press and hold the Wi-Fi button on the printer for about 5 seconds
  • You can see the blinking Wi-Fi indicator with blue light turning into steady blue light


This indicates the establishment of wireless access between the printer and the devices (computer/mobile) connected to the same network.


Read more:

Brother printer offline windows 10

Connect brother printer to wifi

Brother printer drivers

Brother printer printing issues

More posts
Your Dashboard view:
Need help?