logo
Wrong email address or username
Incorrect verification code
back to top
Search tags: tiling
Load new posts () and activity
Like Reblog Comment
text 2022-08-30 18:37
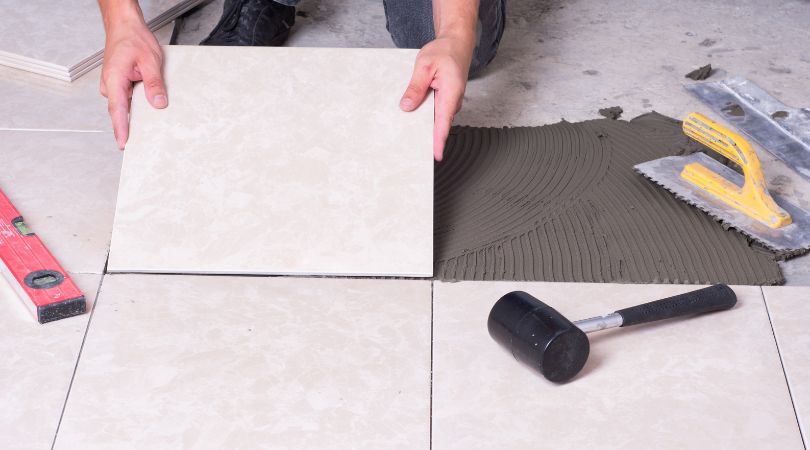
Quick and Easy Tips on Tiling At Home


Dealing with tiling in a new home or during a renovation can be quite the experience, especially if you’ve never had experience dealing with that sort of aspect of building work. There are a few things you will need to know before you can tackle a job of this magnitude, as we will cover in the following points:


When Tiling Shower Trays


You must ensure you tank before tiling your shower trays, both for bath areas and wet rooms, so you can make an area completely waterproof. This ensures you will have fewer issues in the future, and you can still keep the tiling fixtures you worked hard on.


Making a Small Bathroom Look Bigger


Wall-mounted sinks and toilets will give smaller bathrooms the illusion of more space while making them far easier to clean. Use light-coloured plain tiles, and ensure you keep the same shade on the walls and the floors. You can add more colour with towels and accessories.


Retiling Old Floors


When renovating, lifting the old vinyl flooring tiles may be hard or just downright tedious. You could tile right on top of the existing floor, assuming it’s secure and clean enough, but it’s not an ideal solution. You can prime it first with an appropriate primer and ready to go.


Drilling Tiles


Put masking tape on the spot you intend to drill. This will not only stop the drill from sliding around but also help keep it together. Avoid using the hammer action on the drill, and be gentle as you press down. Don’t push the drill into the tile; just let the drill do the work for you and work with patience. If the hole is meant for a screw that needs to go into a raw plug, make the hole in the tile bigger than the hole in your wall. The rawl plug goes into the wall and doesn’t overlap with the tile. Otherwise, that will end up breaking it.


Framing Alcoves in a Shower


Make your shower alcoves smaller if you need to, but making them bigger takes more work and more details involved. You should decide on a finished measurement initially, then move to build the alcove about 20 to 40mm wider than that. Most tiles are 8-10mm thick, so you have some wiggle room to adjust for adhesive depth and alignment with the grout joints.


Decorating a New House with Multiple Bathrooms

Your choice of tiles may be a source of confusion regarding having more than a single bathroom. It may be a good idea to keep things simple, especially regarding kids’ rooms. Choose plain white tiles, as they won’t date and brighten those up with a mosaic border or some sprinkles of colour. This timeless look will be easy to maintain for many years.


Tiling of Bath Panels


If you are tiling the panel on a bath or boxing the whole place, you should ensure you use great quality waterproof plywood. This will allow you to gain access to the plumbing when necessary without the use of ugly screws. Cut a segment of plywood and fix it to the panel with magnets. You can find them at most DIY stores, as they are used for cupboards without handles and similar solutions. Once the segment is tiled, you should attach it to the main panel and grout the joint. When you’re done, you will have a convenient way of accessing the underside of the bath, simply removing the grout and the panel. You can replace the grout when you’re done working on the plumbing.


©Fast Building Company


Like Reblog Comment
text 2019-09-17 07:37
How To Prepare And Install A Wall-To-Wall Carpet

Carpets give your house an overhaul. They enhance their prettiness to provide comfort and reduces unnecessary sound. Old carpets are good too, but their effectiveness decreases with time. The cushion and fabric deplete with time and renders it drab and obsolete.

Carpet tiling and flooring installation require skill and precision. Imperfections can cause damage to your new carpet or the layer of cushion not being installed correctly. Wrong measurements could waste your carpet and cause multiple seams in them. Therefore you must be prepared to install the carpet beforehand.

Removing Old Carpet

Removing your old carpet can be a difficult task. Over time it has collected much dust and captured animal hairs. Expect there to be lots of nails, staple pins, and tackles strips. So make sure to remove them all and get rid of the old one, like this allows you to clean the floor from all the dust it has accumulated over the years. There could be potential mold that you should remove and make the floor clean and smooth.

Sub-floor

The sub-floor plays the most crucial role in the installation of the carpet. As the carpet is going to be installed on the sub-floor, it is necessary to clean the floor thoroughly. Make sure to remove any paint spots, nails, staple pins, and tacks. Fill all the gaps in the floor to make it as smooth and clean as possible. Use a scraper to level out the floor as there can be globs of compound stuck to it. Don’t take any chances on leaving the sub-floor dirty or wet, as it becomes the foundation of the carpet.

Baseboards

Clean and paint the baseboards. You can also get them fixed if they are damaged. Make sure not to get them wet and dripping after cleaning.

Cushion Layer

The cushion layer determines the comfort level of the carpet. It gives you a soft feeling on your feet as if walking in heavens. Make sure to get rid of the old cushion layer and get a new and better one to enhance the comfort of your carpet.

Doors

Make sure to remove all the doors, as they may hinder the installation of the carpet. It makes it easier to work around the area and cut the doorjambs.

Carpet

The measurement of the carpet must be done correctly. The measurement should leave an overhead of about 5 – 7 inches. Measuring the room and cutting the carpet accordingly can be a daunting task and requires experience. So make sure to measure with great care and not to damage or waste your precious carpet.

Seams

Most rooms require multiple pieces of carpet to provide full coverage. As it purely depends upon the architecture of the house. The pieces must be cut with great care and precision, so the pieces are matched perfectly. The seams should be aligned with each other in such an elegant way, that it must be unrecognizable that it is a seam. The seams must be done with the steam iron and seaming tape to seal them correctly. Therefore you need to make sure to keep all the equipment with you.

Tackles Strips

The tackles strip is a piece of the wooden strip, having hundreds of nails to attach the carpet to the floor. Make sure to attach these strips on the right points to ensure the maximum durability of the carper. If the floor is concrete, apply epoxy or any other compound as an adhesive for the strips.

Stretching

This is the most crucial step in installing wall-to-wall carpet. The carpet must be stretched entirely so that there is no extra give in the whole setting. It can be achieved using a knee kicker or a power stretcher. Stretch the carpet and force it to attach with the tackles strip on the edge of the wall. You can also use a binder bar to aid you in this process.

Trimming

Make sure to trim all the edges and around obstacles. Also, cut out any vent openings and attach shoe molding around the house. The trimming makes sure the setup looks nice and clean.

With the above tips and with patience, you can get the task done. Surely it takes much time as compared to an experienced professional. You can always contact Carpet Installation services in South Florida to get professional installation for your carpets. It saves you time and energy.

Source: www.danielflooring.com
Like Reblog Comment
review 1970-01-01 01:00
Tiling 1-2-3
Tiling 1-2-3 - Larry Johnston This is truly an amazing how-to book for tiling. There were so many things I'd not thought of concerning my many upcoming tiling projects. It covers how to demolish, prepare, and tile floors, walls, countertops, patios, fireplaces, and more. This book even tells how to make a shower stall from the ground up and repair a squeaky floor.
More posts
Your Dashboard view:
Need help?