logo
Wrong email address or username
Incorrect verification code
back to top
Search tags: home-e
Load new posts () and activity
Like Reblog Comment
text 2025-04-02 16:35
How Tidiness Affects Mental Health


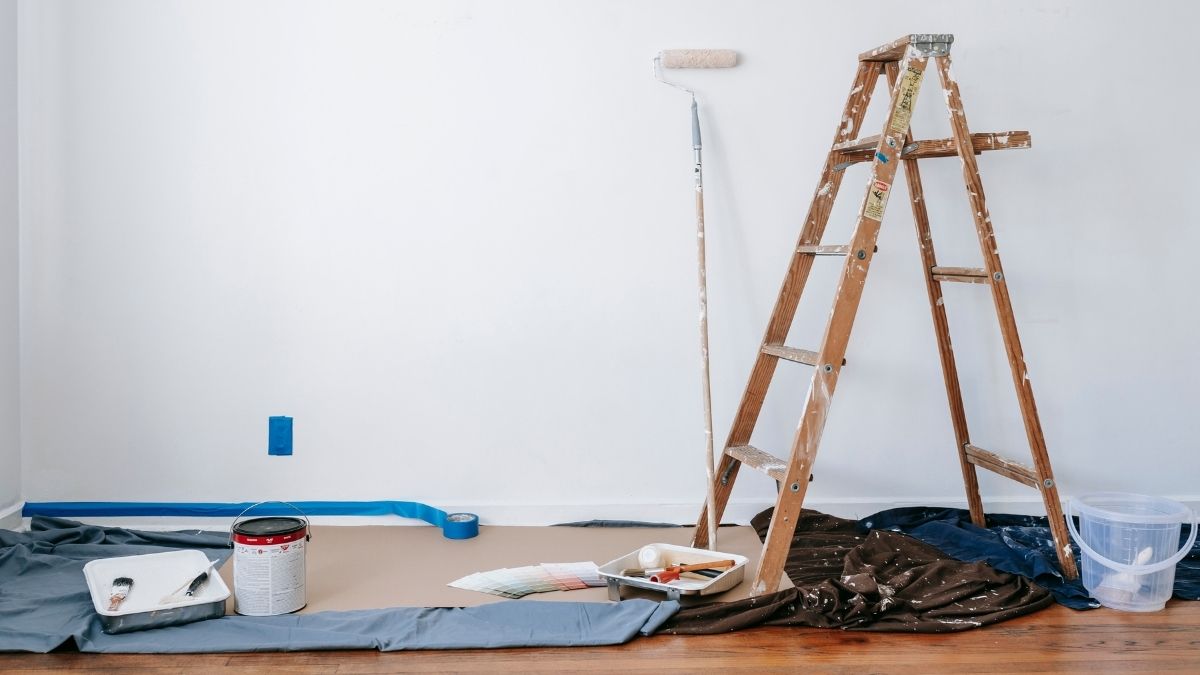
There’s more to a clean home than shiny surfaces and freshly vacuumed carpets. Our living space directly affects how we feel—physically, emotionally, and mentally. When a home is cluttered, chaotic, or unclean, it doesn’t just affect the appearance of a room—it affects the mind, too. Research continues to explore the link between cleanliness and mental health, and the results all point to the same truth: a tidy space supports a healthier, more balanced mind.

While cleaning is often seen as a chore, it’s actually an essential tool for improving your mood, lowering anxiety, and creating a more peaceful home environment. Understanding your surroundings' psychological impact can help shift how you approach home maintenance.

Connection Between Cleanliness and Mood

Your surroundings influence your mindset more than you might realise. The way your home looks and feels feeds directly into your emotional state. When everything is tidy and organised, your brain is able to process information more clearly. On the other hand, clutter and mess create visual noise that can lead to mental overload.

  1. Visual Clutter Equals Mental Clutter
    Walking into a room filled with piles of laundry, scattered items, or dishes in the sink creates instant stress. Even if you're not consciously focusing on the mess, your brain is. It processes every item in the room as something unfinished or out of place, leading to a sense of being overwhelmed.

  2. Order Encourages Calm
    A clean, well-organised room provides a sense of control. Knowing that your home is in order in a world that often feels unpredictable gives you a safe space to relax and recharge. This is particularly important in high-stress situations, such as during a busy work week or after dealing with personal challenges.

  3. Satisfaction and Productivity Boosts
    Completing a cleaning task offers a sense of accomplishment. Whether it’s making the bed, organising a shelf, or cleaning the kitchen, ticking off a task releases dopamine—the feel-good hormone linked with motivation and achievement. A clean home also provides fewer distractions, helping you stay focused on your goals.

Impact on Stress and Anxiety Levels

Clutter isn’t just inconvenient—it can be a significant source of stress. In fact, studies have shown that people who have cluttered homes are more likely to report feelings of fatigue and depression.

  1. Cortisol and Clutter
    Cortisol is the body’s stress hormone. When your environment is messy, your cortisol levels tend to rise. This physical response leads to tension, irritability, and can even affect sleep quality. By contrast, maintaining a tidy home has been shown to reduce cortisol production, promoting a more balanced emotional state.

  2. Cleaning as a Form of Mindfulness
    Repetitive tasks like wiping surfaces, folding laundry, or sweeping floors offer a chance to slow down and focus on the present moment. These activities engage your senses and provide a break from overthinking, similar to the effects of meditation. For many people, cleaning becomes a coping mechanism during periods of anxiety because it offers immediate control and tangible results.

  3. Decluttering to Reduce Decision Fatigue
    Too much choice—whether it’s deciding what to wear from an overfilled wardrobe or navigating a cluttered kitchen—can cause decision fatigue. By clearing unnecessary items from your space, you reduce the number of choices you need to make, which in turn lowers mental exhaustion.

  4. Improved Sleep Quality
    A messy bedroom can interfere with sleep more than most people realise. Dirty laundry, dusty shelves, and general disorganisation create a subconscious sense of unease. A clean, calm bedroom promotes better sleep hygiene, leading to deeper rest and more restorative nights.

Creating a Calming Environment Through Cleaning

The goal isn’t to have a spotless home at all times—it’s about creating a space that feels comfortable, balanced, and calming. Small, intentional cleaning habits can make your home a mental refuge rather than a source of stress.

  1. Focus on Key Areas
    If time is limited, target the areas where you spend the most time or those that affect you the most. For example, keeping your bedroom and bathroom clean has a direct impact on your rest and daily routines.

  2. Choose Calming Scents and Natural Light
    Beyond surface cleaning, think about your senses. Opening windows, using lightly scented cleaning products, and choosing calming colours or natural light can elevate your mood. Cleanliness isn’t just visual—it’s sensory, too.

  3. Use Cleaning as a Reset
    Even a quick tidy-up session can act as a mental reset. After a tough day, setting a timer for 15 minutes and focusing on a specific task—like clearing the kitchen counters or making the bed—can help you regain focus and ease tension.

  4. Build Simple Routines
    Rather than saving everything for a weekend blitz, spread cleaning tasks throughout the week. Daily 10-minute sessions or assigning specific rooms each day can prevent tasks from becoming overwhelming. Consistency, not perfection, is the goal.

  5. Minimise Possessions
    A calmer home starts with fewer items. Decluttering reduces the effort needed to clean and creates more open, breathable space. Letting go of unnecessary belongings not only frees up your physical space but can have a surprisingly freeing emotional effect as well.

  6. Embrace Imperfection
    It’s important to remember that no home stays spotless forever. Life happens—messes happen. Instead of chasing perfection, focus on creating a space that supports your well-being. A comfortable, clean-enough home often serves your mental health better than one that’s pristine but stressful to maintain.


Final Thoughts

The link between mental well-being and your surroundings is undeniable. A clean, organised home supports clearer thinking, reduces anxiety, and provides a more peaceful backdrop to your daily life. Whether it’s a short tidy-up each evening or a full weekend refresh, your cleaning efforts do more than improve aesthetics—they protect your peace of mind.

Investing time in keeping your space in order is really an investment in yourself. A tidy home won’t solve every problem, but it can certainly make life feel more manageable and your mind feels more at ease.

FAQs


Can cleaning actually improve my mood if I’m feeling low?

Yes. The act of cleaning provides immediate results, which can improve your mood and give a sense of control. Even small tasks like wiping down a surface or organising a drawer can help shift your mindset.

How can I stay motivated to clean when I feel mentally drained?

Start small. Set a timer for five minutes and tackle just one area. Often, the sense of accomplishment from completing a task helps build momentum for more.

What if I find cleaning overwhelming because of clutter?

Begin with one drawer, shelf, or surface. Decluttering doesn’t have to happen all at once. Slow, consistent progress reduces the pressure and makes the process more manageable over time.

© Domestic Cleaners Ltd


Like Reblog Comment
text 2025-03-30 16:16
Essential Tips for a Smooth Home Removal Experience

Moving home can be an exciting yet stressful experience, with so many tasks to manage before the big day. Proper planning, efficient packing, and hiring a reliable removal service can make all the difference in ensuring a smooth transition. Following these essential tips can reduce stress and make your home removal as seamless as possible.

Planning and Organisation

A successful move starts with careful planning. The earlier you begin, the more manageable the process will be. Start by creating a detailed moving checklist that includes key tasks such as decluttering, packing, and booking a removal company. Setting a realistic timeline helps keep everything on track and prevents last-minute chaos.

Decluttering before packing is essential. Go through each room and decide what to keep, donate, or dispose of. Moving unnecessary items only adds to the workload and increases costs, so take this opportunity to minimise clutter. Notify important contacts such as utility providers, banks, and local authorities about your change of address well in advance to ensure a smooth transition.

Label boxes clearly with their contents and the room they belong to in your new home. This makes unpacking much easier and helps removal teams place boxes in the correct locations. Keep important documents, valuables, and essentials such as toiletries and a change of clothes in a separate bag to have them easily accessible during the move.

Packing Strategies

Packing efficiently reduces the risk of damage and makes unpacking more straightforward. Invest in sturdy boxes, bubble wrap, and packing tape to protect breakable and fragile items. Heavier items such as books should be packed in smaller boxes to make lifting easier, while lighter items like bedding can go in larger boxes.

Wrap breakable items individually and use padding such as towels or packing paper to cushion them inside boxes. Clearly mark fragile items to ensure they are handled with extra care. Disassemble large furniture where possible to save space and make transportation easier. Keep screws, bolts, and small parts in labelled bags so they don’t get lost.

Avoid overfilling boxes, as this makes them difficult to lift and increases the risk of breakage. Seal boxes securely with strong tape to prevent them from opening during transit. If you’re moving with pets or children, pack their essentials separately to ensure they have everything they need without having to search through multiple boxes.

Choosing a Reliable Removal Service

A professional removal company can make a huge difference in ensuring a hassle-free move. Take the time to research and compare different services before making a decision. Reading customer reviews and checking recommendations can give you insight into a company’s reliability and professionalism.

Ask about the services they offer, including packing assistance, furniture dismantling, and storage options. Get a detailed quote in writing to avoid unexpected costs and ensure the service fits your budget. If you have valuable or fragile items, check whether the company provides insurance coverage for added peace of mind.

Confirm the date and time of your move with the removal company well in advance to secure your booking. On the day of the move, communicate clearly with the team to ensure everything is handled according to your plan.

FAQs

How far in advance should I book a removal company?

It’s best to book at least four to six weeks in advance, especially during peak moving seasons. This ensures availability and allows enough time for proper planning.

What is the best way to protect fragile items during a move?

Wrap each item individually using soft padding or bubble wrap, and pack them in sturdy boxes with extra cushioning. Label them as fragile so movers handle them with care.

Should I pack everything myself or use a packing service?

It depends on your preference and time constraints. Packing yourself can save money, but professional packing services ensure items are securely packed and reduce the risk of damage.


© All Services In One

Like Reblog Comment
text 2025-03-30 15:51
The Impact of Lighting on Paint Colours

When selecting paint for a room, it’s tempting to focus solely on the colour swatch in the shop. Yet, depending on the room's lighting, that same colour can look dramatically different once applied to the wall. Both natural daylight and artificial sources influence how we perceive colour, sometimes enhancing it and other times distorting it entirely.

This is why a shade that seemed perfect under showroom lights might feel too dull, too bright, or just “off” once it’s on your walls. Understanding the relationship between light and paint helps avoid costly mistakes and ensures a space feels exactly as intended.

Why Light Changes the Way Paint Looks

Paint doesn’t change, but our perception of it does. Light interacts with pigment in complex ways, affecting depth, tone, and vibrancy. The amount, type, and direction of light all influence how a colour appears. These variations become especially noticeable across different rooms in the same house or even on opposite walls in a single space.

What seems like a minor detail becomes crucial when the paint is applied on a large scale. Colours that appear soft and neutral can suddenly feel cold or muddy. Bright tones might look overpowering. Even the time of day plays a role, making a room feel bright and airy one moment and sombre the next.

How Natural Light Affects Paint Perception

Natural daylight shifts throughout the day and varies depending on which direction the room faces. These changes can subtly—or dramatically—alter how colours appear.

North-facing rooms often receive cooler, indirect light, which can cause colours to take on a bluish tint. Pale greys may seem icy, while whites can feel stark. Warmer tones like soft beige, warm taupe, or dusty pinks help counteract the coolness and make the space more inviting.

South-facing rooms enjoy the most consistent daylight, usually warm and golden. In these spaces, colours tend to appear brighter and more saturated. Deep colours become richer, and even pale tones gain warmth. This natural boost allows more flexibility in colour choice, especially for bolder shades.

East-facing rooms get bright, warm light in the morning, which then cools as the sun moves. This can make the paint look fresh and warm in the early hours but slightly duller by the afternoon. Soft yellows, peach tones, and gentle neutrals work well, maintaining warmth without relying on intense light.

West-facing rooms are dimmer in the morning and gain warm, golden light later in the day. Because of this contrast, some colours can feel flat in the morning but come alive in the evening. Muted greens, greys, or terracotta tones often feel balanced in this shifting light.

How Artificial Lighting Alters Colour

Most rooms rely on artificial lighting at some point in the day, especially during darker months. The type of bulb you use has a significant effect on how paint is perceived.

Warm white bulbs (common in most households) emit a yellowish light. This can warm up cool colours or make warm tones feel even more intense. It often softens harsh whites but can also make some colours look dull or overly golden.

Cool white or daylight bulbs lean towards blue tones. They enhance crispness in whites and greys but can make warmer colours seem slightly faded or washed out. In areas where precision matters, such as kitchens or home offices, these bulbs can make spaces feel cleaner and more alert.

Halogen bulbs produce a clean, white light closer to daylight. They tend to provide the most accurate colour rendering, so they’re often used in showrooms or galleries.

LED lights are available in different tones—from warm to cool—so they can be chosen to suit the space. Their versatility makes them useful in homes where lighting may shift based on the time of day or activity.

Testing Paint Samples the Right Way

Many people skip or rush the testing phase and then regret it once the paint dries on the wall. Taking the time to test properly helps avoid a mismatch between expectation and reality.

Start with larger samples. Tiny swatches don’t give you a full picture. Use actual paint to apply a square at least A4-sized directly onto the wall. Try it in more than one place, especially if the room gets uneven light throughout the day.

Check the colour at different times. Morning light, afternoon sun, and evening artificial lighting all bring out different undertones. What looks perfect at noon may appear muddy under lamplight. Make notes at various times of day to see how it holds up.

Try out your usual lighting. Use the same bulbs and fixtures that the room will have once decorated. Assess the paint under both if you use a mixture of overhead lighting and lamps. You’ll be surprised at how colour shifts in different settings.

Avoid painting on existing colours. If your walls are currently a dark or bold shade, it can interfere with how the sample appears. Either paint over a patch with white first or apply the sample on a large sheet of white card and move it around the room.

Pay attention to sheen. Flat matt, eggshell, satin, and gloss all reflect light differently. Glossy finishes bounce light and enhance brightness, which can make colours appear lighter. Matte finishes absorb light and soften tones. Always test in the intended finish.

Adapting Paint Choices Based on Lighting

Once you’ve tested the samples, you might realise your original choice needs a slight adjustment. It’s better to tweak the shade before committing to litres of paint.

Consider choosing colours with a warm base in dark or poorly lit rooms. Creams, muted yellows, or soft peaches can make a space feel brighter and more welcoming. Avoid overly cool tones unless you want a deliberately moody effect.

In overly bright rooms, bolder or darker colours can prevent the space from feeling washed out. Natural light will lift these shades, making them feel rich but not oppressive. Navy, charcoal, or forest green can be surprisingly subtle in bright spaces.

In mixed-light rooms, neutrals with balanced undertones—often called greige—work well. They adapt to shifting light without veering too cool or too warm. These flexible tones suit hallways and open-plan spaces where light varies throughout the day.

Design Considerations Around Light and Colour

Choosing paint is not only about picking a colour you like—it’s about selecting one that works in the space you live in. Take stock of your flooring, furnishings, and soft décor. All of these elements affect how colour is perceived.

A pale grey wall might look clean and crisp in a modern, minimally furnished space. The same colour in a room with wooden floors and beige upholstery could take on a greenish or lavender tone. Lighting interacts with surrounding elements, so view your paint alongside everything else in the room.

Mirrors, curtains, and flooring materials also affect how light moves around the space. Glossy floors or mirrored surfaces bounce light, amplifying brightness. Dark carpets or thick drapes absorb light, making the same paint colour appear slightly more muted.

Bringing Lighting and Colour into Harmony

The best rooms achieve harmony between paint and lighting. Whether you're working with abundant natural daylight or relying on artificial sources, understanding how light affects colour is essential. Taking the time to test, observe, and tweak before committing allows you to create a space that feels intentional and well-balanced.

Rather than focusing solely on the colour swatch, look at how light changes it throughout the day. Consider your fixtures, bulbs, and existing furnishings. By planning with lighting in mind, you’ll avoid surprises—and enjoy a paint finish that truly complements your home.

FAQs

Can I rely on digital mock-ups or online previews when choosing paint?

Digital previews can be helpful for visualising colour schemes, but they aren’t reliable for final colour decisions. Screen settings, brightness, and image filters all affect how colour appears. Always test physical samples in the actual space.

Why does the same paint look different in two rooms?

Light direction, bulb type, surrounding colours, and surface textures all influence how paint is perceived. Even if the colour is identical, the environment changes how our eyes interpret it.

Should I change my lightbulbs before choosing paint colours?

If you’re planning to update lighting, do it before selecting paint. The type and tone of lightbulbs significantly affect how colours appear, so it’s important to test under the final lighting conditions.

© APA Painters & Decorators


Like Reblog Comment
text 2025-03-06 01:09
Essential Cleaning Tools Every Home Should Have

Keeping a home clean is much easier with the right tools. A well-stocked cleaning kit ensures every surface, from floors to countertops, stays fresh with minimal effort. Investing in high-quality equipment also improves efficiency, saving time and reducing the need for excessive scrubbing or repeated cleaning.

Must-Have Cleaning Tools and Their Uses

Equipping your home with the right tools makes daily cleaning tasks more manageable. The following essentials cover a wide range of household cleaning needs.

1. Microfibre Cloths

Unlike standard rags, microfibre cloths trap dust and dirt more effectively without leaving lint or streaks behind. They are ideal for wiping surfaces, polishing glass, and picking up pet hair.


2. Extendable Duster

Dust quickly accumulates on ceiling fans, shelves, and light fixtures. An extendable duster allows easy access to high and hard-to-reach places without the need for ladders.


3. Scrub Brushes

Some surfaces require more than a simple wipe. Stiff-bristled brushes help remove stubborn grime from tiles, grout, and outdoor furniture, while softer brushes work well on delicate surfaces.


4. Vacuum Cleaner with Attachments

A good vacuum cleaner does more than clean carpets. Models with different attachments handle various tasks, including removing dust from skirting boards, upholstery, and mattresses.


5. Squeegee

Essential for keeping windows, glass doors, and shower screens streak-free, a squeegee prevents water spots and soap scum buildup.


6. Spray Bottles

Refillable spray bottles allow easy application of homemade or store-bought cleaning solutions. Keeping a few on hand for different mixtures ensures convenience when tackling various surfaces.


7. Mop and Bucket

A sturdy mop paired with a good bucket is essential for maintaining floors. A microfibre mop head absorbs spills effectively and dries quickly, reducing streaks on hard floors.


8. Lint Roller

While commonly used for clothing, a lint roller is also great for picking up hair, crumbs, and dust from furniture, curtains, and even lampshades.


9. Rubber Gloves

Protecting hands from harsh chemicals, dirt, and bacteria, a quality pair of rubber gloves prevents skin irritation while making cleaning more hygienic.


10. Dustpan and Brush

Ideal for sweeping up small messes without pulling out the vacuum, a dustpan and brush set is useful for quick clean-ups in kitchens and entryways.


Why Quality Cleaning Tools Matter

Choosing high-quality tools improves efficiency and durability. Cheap alternatives often wear out quickly, shedding bristles, losing absorbency, or breaking under frequent use. Investing in well-made equipment not only saves money in the long run but also delivers better results.


For example, a premium vacuum cleaner with a HEPA filter removes allergens more effectively than a basic model. A sturdy mop with a washable head provides better floor coverage and lasts longer than disposable alternatives. Similarly, a durable squeegee ensures a streak-free finish on glass without constant replacements.


How to Maintain Cleaning Tools for Long-term Use

Even the best tools lose effectiveness if not properly maintained. Keeping them clean and in good condition extends their lifespan and prevents cross-contamination.

  • Microfibre Cloths – Wash regularly without fabric softener to maintain absorbency.
  • Scrub Brushes – Rinse after each use and soak in warm, soapy water to remove trapped dirt.
  • Vacuum Cleaner – Empty the dustbin, clean the filters, and check for blockages in attachments.
  • Squeegee – Wipe down the rubber blade after use to prevent streaking.
  • Mop Heads – Wash reusable mop heads in hot water and allow them to air dry completely.
  • Spray Bottles – Rinse thoroughly before refilling to prevent residue build-up.


Taking a few extra minutes to clean and store tools properly ensures they remain effective for longer, reducing waste and unnecessary replacements.


A Well-Equipped Home for Easier Cleaning

Having the right cleaning tools makes maintaining a tidy home simpler and more efficient. Investing in durable, high-quality equipment and keeping it well-maintained ensures every cleaning task is completed with ease. A well-prepared cleaning kit not only saves time but also improves results, making household upkeep less of a chore.


FAQs


How often should cleaning tools be replaced?

It depends on usage and care. Microfibre cloths and mop heads last several months with proper washing, while vacuum filters should be changed as recommended by the manufacturer.


What is the best way to prevent bacteria build-up on cleaning tools?

Rinsing tools thoroughly after each use and allowing them to dry completely helps prevent bacteria growth. Disinfecting scrub brushes and sponges weekly also keeps them hygienic.


Are expensive cleaning tools worth the investment?

Yes, high-quality tools often last longer and perform better. A durable mop, vacuum cleaner, or squeegee reduces the need for frequent replacements and improves cleaning efficiency.


For expert cleaning tips and professional advice, visit London Domestic Cleaners.

© London Domestic Cleaners

Like Reblog Comment
text 2025-02-11 16:36
Preparing Your Home for a Professional Paint Job

A fresh coat of paint can completely transform a home, but achieving a flawless finish requires more than just skilled painters and quality materials. Proper preparation before the professionals arrive makes all the difference in ensuring a smooth process and a long-lasting result. Homeowners who take the right steps in advance not only help speed up the work but also contribute to a better finish. Here’s how to get your home ready for a professional paint job.

Decluttering the Space and Protecting Belongings
Before the painters start, it's essential to clear the area as much as possible. Removing furniture, wall décor, and any fragile items allows for easy access to walls and ceilings, preventing potential damage. If moving everything out of the room isn’t feasible, shifting furniture to the centre and covering it with dust sheets works well. This ensures that paint splatters don’t ruin upholstery or delicate surfaces. Curtains, blinds, and rugs should also be taken down or covered to protect them from dust and accidental splashes.

Cleaning Walls and Surfaces
Paint adheres best to a clean surface, so any dust, grease, or stains should be dealt with beforehand. Kitchens and bathrooms, in particular, tend to accumulate grime that could affect paint application. A simple solution of mild detergent and warm water is usually enough to remove most surface dirt, while stubborn stains may need a specialised cleaner. Once washed, walls should be left to dry completely before any painting begins.

Addressing Repairs and Damage
Small imperfections such as cracks, dents, or peeling paint can affect the final result. While professional painters will often carry out minor repairs as part of their service, homeowners can save time by identifying and addressing these issues in advance. Filling holes left by picture hooks or nails, sanding rough patches, and replacing damaged plaster where necessary ensures a smoother finish. This step is especially crucial in older homes where wear and tear is more pronounced.

Ensuring Proper Ventilation
A well-ventilated space helps paint dry efficiently and minimises the build-up of fumes. Opening windows and doors improves airflow and speeds up the curing process. If painting is planned for colder months, checking that heating can be adjusted to help maintain an appropriate drying temperature is beneficial. Proper ventilation not only enhances the outcome but also ensures a safer environment for those in the home.

Confirming Paint Choices in Advance
A professional paint job is a significant investment, so finalising colour and finish choices before work begins avoids last-minute decisions and delays. Testing sample patches on the walls in different lighting conditions helps homeowners feel confident in their selection. Once a choice is made, confirming it with the painting team ensures the correct products are ordered and ready for application.

Providing Easy Access to the Work Area
Painters need space to work efficiently, so clearing pathways and ensuring access to all rooms being painted is important. Moving personal items out of the way, keeping pets in another part of the house, and making arrangements for children to be elsewhere during painting hours can prevent interruptions. This allows the team to focus on the job without unnecessary distractions.

Discussing Expectations with the Painters
Good communication with the painting team helps set clear expectations. Discussing timelines, preferred working hours, and any specific requirements in advance prevents misunderstandings. If there are areas that need extra attention, mentioning them beforehand ensures they are included in the plan. A brief walkthrough with the painters before they begin allows both parties to confirm details and agree on the best approach.

Checking External Conditions for Exterior Painting
If the project involves exterior painting, weather conditions play a key role in achieving the best results. Heavy rain, extreme cold, or strong winds can interfere with paint application and drying times. While professionals monitor the forecast and adjust schedules if needed, homeowners should also be aware of how changing conditions may impact the project. Ensuring gutters are clear and trimming back any overgrown plants near the walls provides the painters with unobstructed access.

Allowing Enough Time for the Process
Quality paintwork takes time, and rushing the process leads to poor results. While professional painters work efficiently, drying and curing times must be factored in. Depending on the type of paint used and the number of coats required, some areas may need to remain untouched for a day or two before being fully functional again. Being realistic about timelines and allowing extra time for the best finish ensures a stress-free experience.

Final Walkthrough and Inspection
Once the painting is complete, a final walkthrough with the painters helps address any touch-ups or concerns before the project is signed off. Checking corners, edges, and high-traffic areas for any inconsistencies ensures a perfect finish. If there are any areas that require minor adjustments, noting them immediately makes it easier for the team to correct them before they leave.

A professional paint job not only enhances the appearance of a home but also adds to its durability and value. By preparing properly before the work begins, homeowners contribute to a seamless process and a flawless result that lasts for years to come.

FAQs

How long should I wait before putting furniture back after painting?
It’s best to wait at least 24 hours before moving furniture back into place. Some paints may take longer to cure fully, so checking with the painters on drying times helps avoid smudges or marks.

Will I need to be home while the painters work?
Not necessarily. Many professional painters work independently, but being available at the start and end of each day to check progress and answer any questions can be helpful.

Do I need to provide any materials or equipment for the painters?
Professional painters bring their own tools, brushes, and ladders. However, if there are specific paint brands or finishes you prefer, discussing this beforehand ensures they use the right products.

© APA Painters & Decorators

More posts
Your Dashboard view:
Need help?