It's Shelf Time! The makeover on BookLikes is still on. It's time for your shelves.
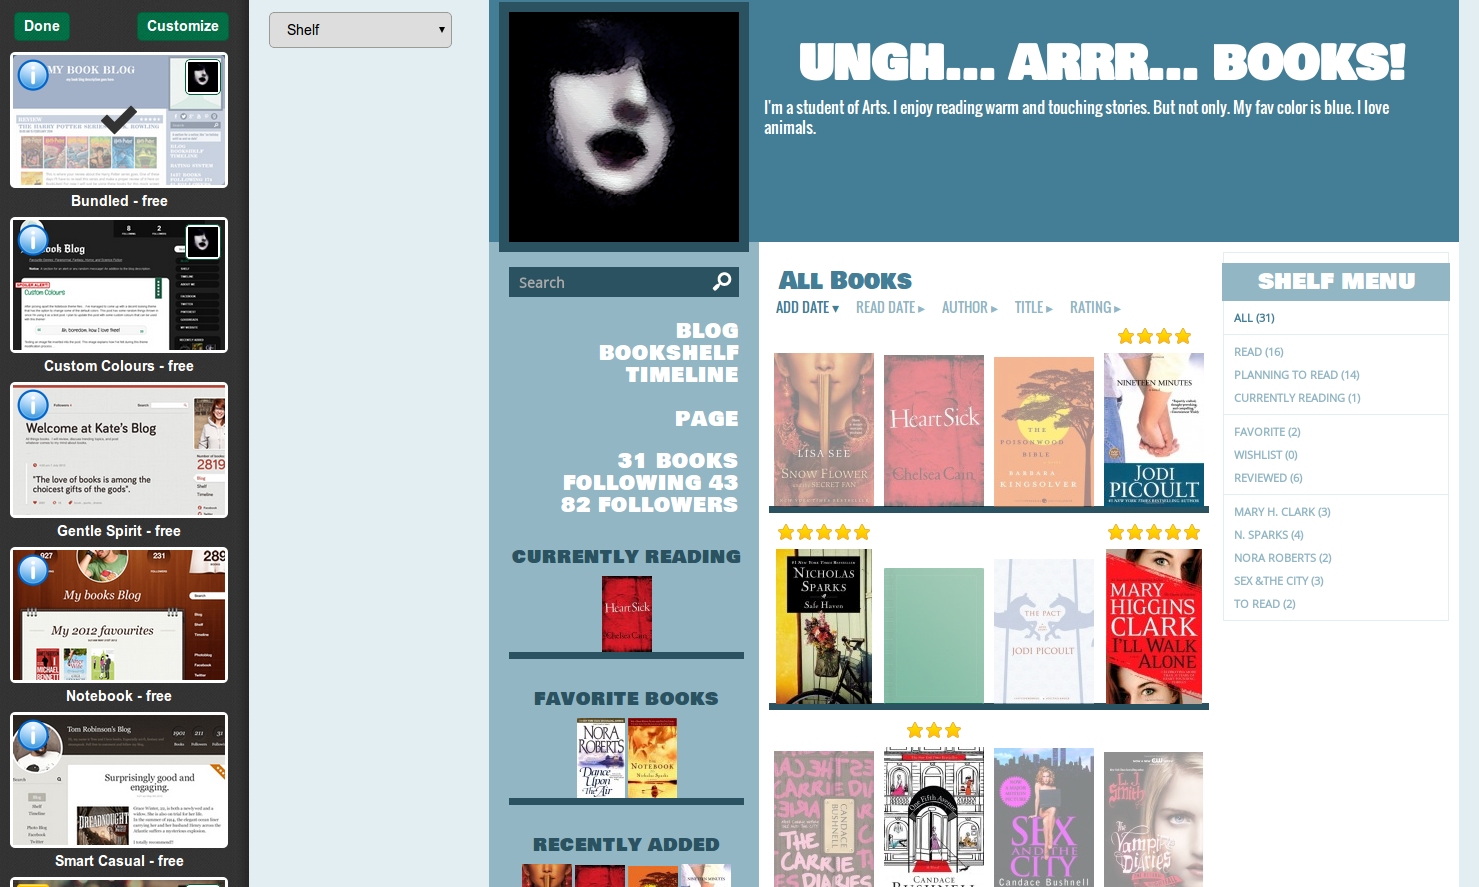
Your main Shelf Page has just received a new look. Don't worry, all the shelf options are there, it's also a good timing to remind all the shelf features on BookLikes. Please have a look at the know-how and the shelf tips below.

1 - Add a new shelf - this option is placed on the top, next to the book count. Press the button, write a shelf name and press enter. Your new shelf will be added. You can also set it as as exclusive status, then it will be added under other statuses: Read, Planning to read and Currently reading.
2 - A Shelf search - Now you can search your shelf not only in the table view but also in the cover view.
3 - Sort by option for your books - choose how to view your books. You can choose the default vie in the Shelf Settings (number 8). The default view is visible for you and your blog guests.
4 - Your private notes - find books with your private notes. Additionally, the book with a private note receives a note dot under the cover.
5 - Shelve it! button - a feature that helps you shelving new books from other webpages (e.g. Amazon book pages and GR).
6 and 7 - Cover view and Table view for your Shelf - you can change that as you wish, to set a default Shelf view, go to Shelf Settings (number 8).
8 - Shelf Settings - This is the place to manage your shelves, statuses and sorting options, have a look at available options below.

There's quite a lot of things to do in here:
a - Add shelf; add new shelf, you can also set the shelf as an exclusive status;
b - Choose the default shelves order - alphabetical or manual (then you can decide which of your shelves should be on top);
c - Choose Shelf Page view - the cover view or the table view;
d - The Book order - how books on your shelf should be presented (this is how you and your blog guest will see the books on your shelf);
e - Rename - change the name of your shelf;
f - Position - if you wish to set your shelves manually, you can choose its position (write number or use drag and drop);
g - Set an existing shelf as an exclusive status;
h - Delete the shelf.
Remember to Save all the changes in the particular sections to make all the updates visible on your Shelf page.
The Table Shelf View options remain the same and the change is only slight. See what you can do with your book in the shelf table view below.

i - select one or several books, this will activate the option on the top of the table vie (k, l, m);
j - select all the books - you can select all the books visible on this shelf page;
k - add to shelves - add selected book(s) to shelf/shelves;
l - take books off the selected shelf - choose a shelf, select the books and take them off the chosen shelf; the books will stay on your Shelf Page, only the shelves they are on will be changed;
m - delete books from your shelf - select book(s) and delete them from your shelf page; even if you delete the books from the Shelf, the review attached to this book will remain on your blog;
n - choose how many books per page in the table view to see;
o - sort by options; cover - see book without a cover and add missing images to green books; Title/Author - alphabetical order; Ratings - according to your rating stars; My review - books with/without a review; Date Read - finished reading date;
p - add rating stars to your books;
q - add review, see review or edit review; the options depends whether the review is attached or not;
r - edit shelves for a given book; click Edit in the Shelves column;
s - add the finished reading date; only books with filled out Read Date count to your reading challenge;
t - delete a book from your shelf.
Updates & Tips
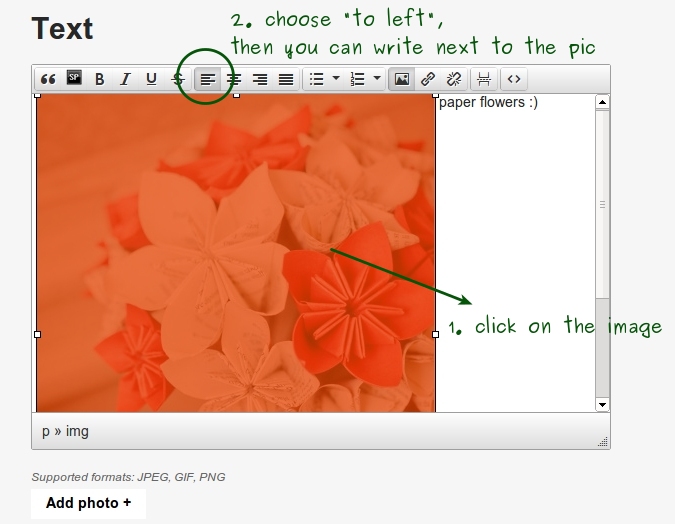
Recently we've done the updates to the writing box, the one where you create your reviews and posts. Sorry for any confusions or troubles. The formatting tools should be on the top of the box, if you still can't see them, please refresh the page to make your browser see all our changes. The new tool bar look like this:

Some options have also changed, for example the way to set a position for a photo in your post - to set a picture use the align options. Please add photo to your post as usual and follow the steps below.

photo source: via


 Log in with Facebook


